


Why Seed Cleaning Is a Critical But Often Overlooked Process
 November 19, 2025
 A vast majority of commercially grown plants begin as seeds, with ferns being the primary exception. While collecting seeds is straightforward, subsequent steps must be taken to sort out competent seeds (those with properly developed contents likely to give rise to new plants) to be germinated and grown for any number of downstream purposes. The entire process can be broken into three steps: collecting, cleaning, and analyzing. This is the process I use for the seeds in our breeding program, but all these steps may not be necessary depending on various factors, such as the quantity of seeds available and the germination rate of the given taxon. In this article, I will use photos (check out the slideshow on this page) detailing the collection process of Vernonia noveboracensis as an example.


View all


Collection
Collection is the first and most simple step of the process. The two variables to consider when collecting seeds are timing and effort. Ideally, seeds are collected once they are mature and dry, but some taxa can be harvested earlier. If harvested early, seeds are stored in brown paper bags or hung (if still held within fruit) to dry them out and prevent rot. The best collection time relates to bloom period. Some taxa have mature seeds just a few weeks after flowering, while others take months to mature. This, combined with variation across bloom periods, means that the best collection time can be anywhere from early summer to late fall.
The degree of effort made when collecting seeds largely determines how easy the cleaning process is. Quick and hasty collection involves taking parts of stems and inflorescences (collectively referred to as chaff) that will need to be separated from the seeds later. Depending on the taxon and the seed’s maturity, separating the seeds from the chaff can be easy or difficult.
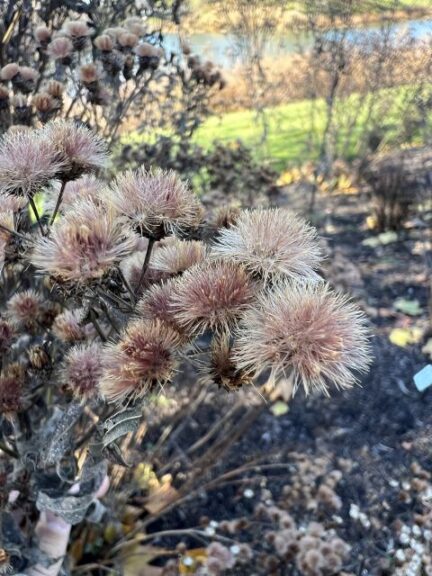
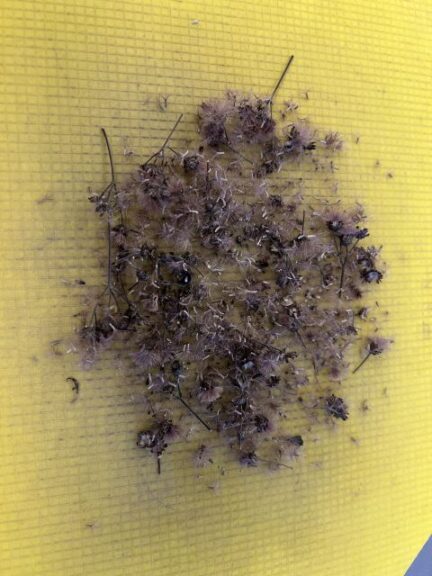
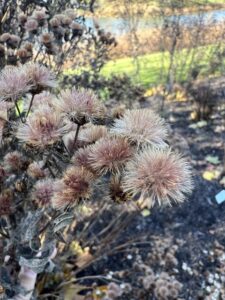
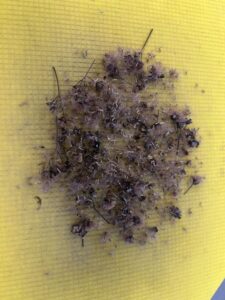
In the first photo, taken in early November, you can see that the capitula (flower heads) have expanded, with their seeds and pappi (hairs) fanning out to form small pom-poms. This suggests that the seeds are mature and ready to collect, which was confirmed by how easily the seeds broke from the flower heads. To collect these seeds, I simply pulled on the base of each flower head. Most often, only the flower heads break off, but sometimes stems break off too. Bracts from the flower heads break away and mix in with the seeds, as seen in the second photo.


Cleaning
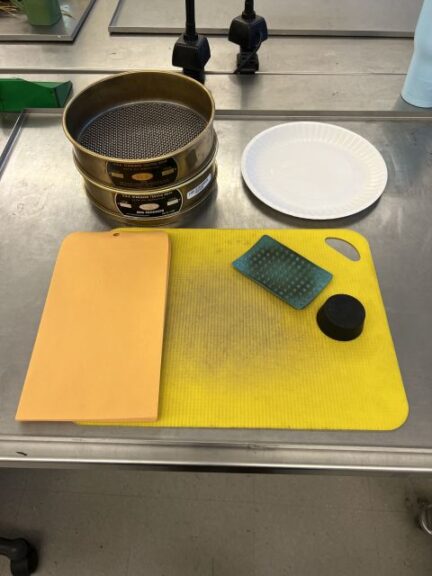
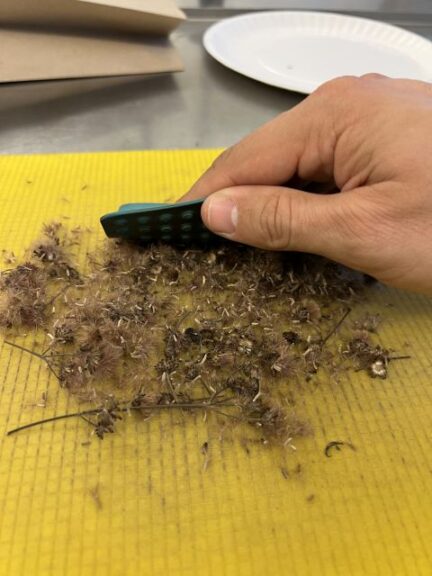
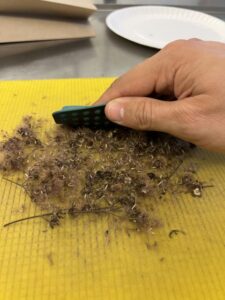
Seed cleaning is the most comprehensive part of the process. The primary tools to clean seeds are shown in the third photo. These include rubbing tools, a mat with a raised matrix, sieves, plates, and envelopes. If collected within fruit, the fruits must be broken open either manually or by rubbing them between a rubber tool and the mat. Once exposed, seeds themselves may be rubbed in the same manner to remove other plant parts attached to them, as is the case with the hairs attached to the Vernonia seed, which is common in seed of the Asteraceae (aster family). This practice is shown in the fourth photo.
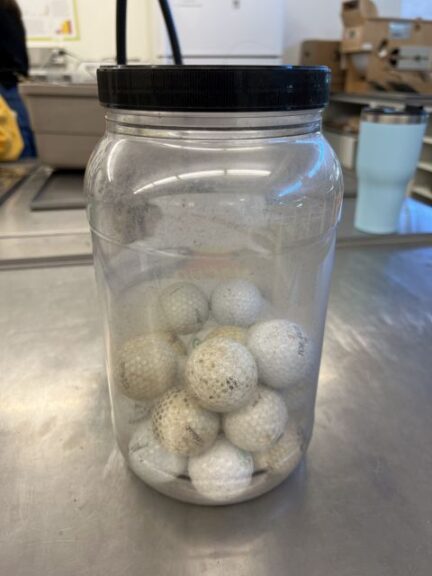
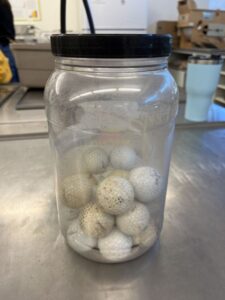
Another useful method for some taxa involves putting entire inflorescences in a plastic container with some golf balls (shown in the fifth photo) and shaking the container. The golf balls collide violently with the inflorescences, releasing seeds from them. This works well when rubbing doesn’t break up inflorescences, as is common in some members of the Lamiaceae (mint family). Though this sounds barbaric, it is effective and does not damage seeds as one may expect.
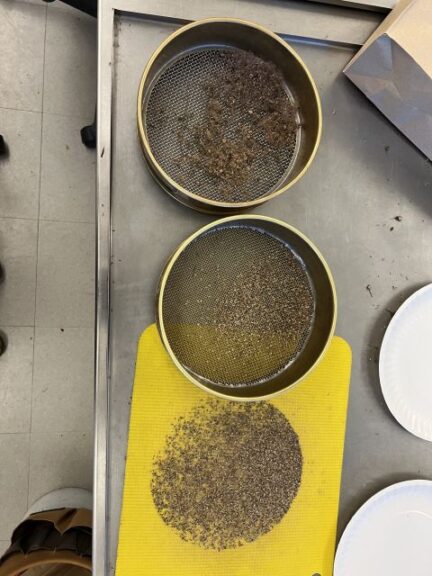
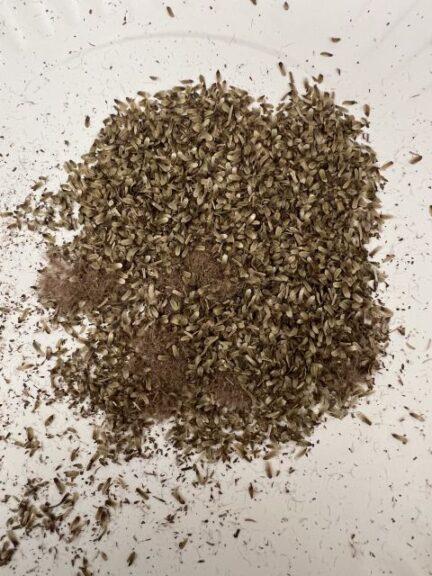
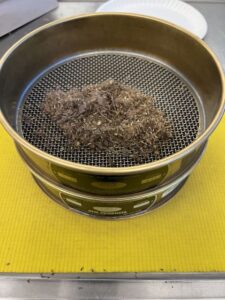
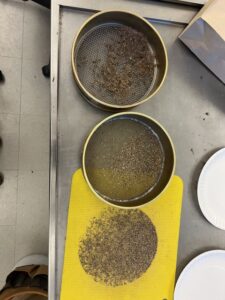
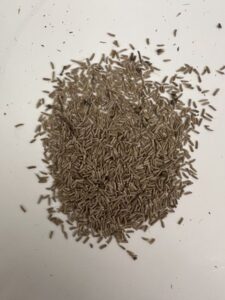
Once seeds are separated from other plant parts, they are sifted through sieves of assorted sizes to isolate them, as seen in the sixth photo. Depending on the taxon, the seed or chaff will pass through the sieves. Inevitably, chaff of similar size will remain with the seeds after sieving, as shown in the seventh photo. Seeds still attached to other plant parts may remain in larger sieves, which can then be rubbed further.
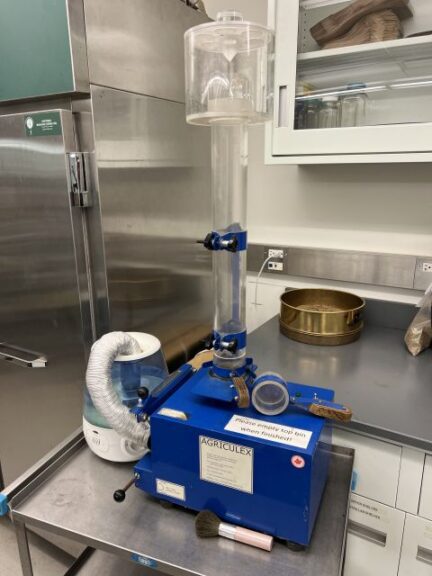
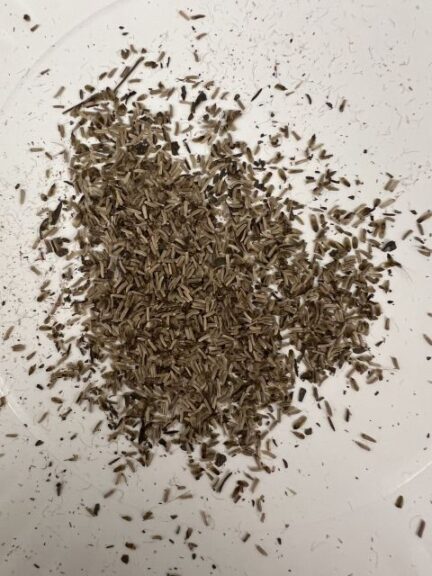
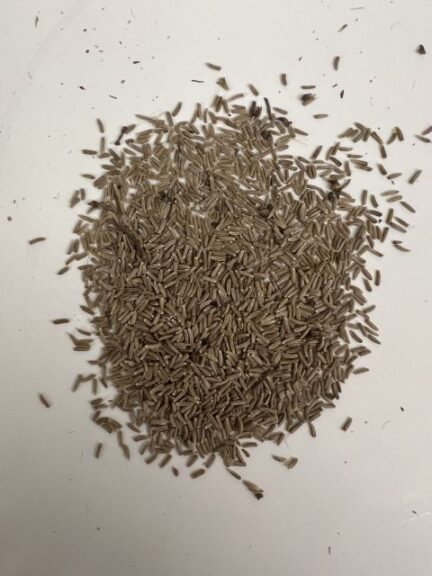
After sieving, seeds are processed in a blower, shown in the eighth photo. In this machine, seeds sit in a small basket with a mesh bottom while an air current passes up through the basket and a column. The top of the column flares out and down to collect what reaches the top. Competent seeds have a higher weight:surface area ratio than incompetent seeds and most chaff, so the strength of the air current can be increased until the latter materials are blown up and separated from the competent seeds. At this point, the seeds remaining in the basket should have a uniform appearance. The ninth, tenth, and eleventh photos show chaff, heavier chaff/incompetent seeds, and competent seeds, respectively, separated by the blower. If later analysis shows incompetent seeds remaining among the competent seeds, the seeds can be exposed to a stronger current, as incompetent seeds lack a developed embryo and endosperm and are therefore lighter. Even if a few competent seeds are removed with the incompetent seeds, I typically have far more competent seeds remaining than I’ll need.
Parts of the rubbing, sieving, and blowing process can be cycled through as necessary to obtain the desired set of competent seeds. In the case of Vernonia, manually rubbing the stubborn hairs from the seeds is the most laborious part. This is important, though, as seeds with hairs will not sieve properly and will rise through the blower column at a lower strength current than the seed alone would. After all, the purpose of the hairs is to aid seeds with wind dispersal.
Analysis
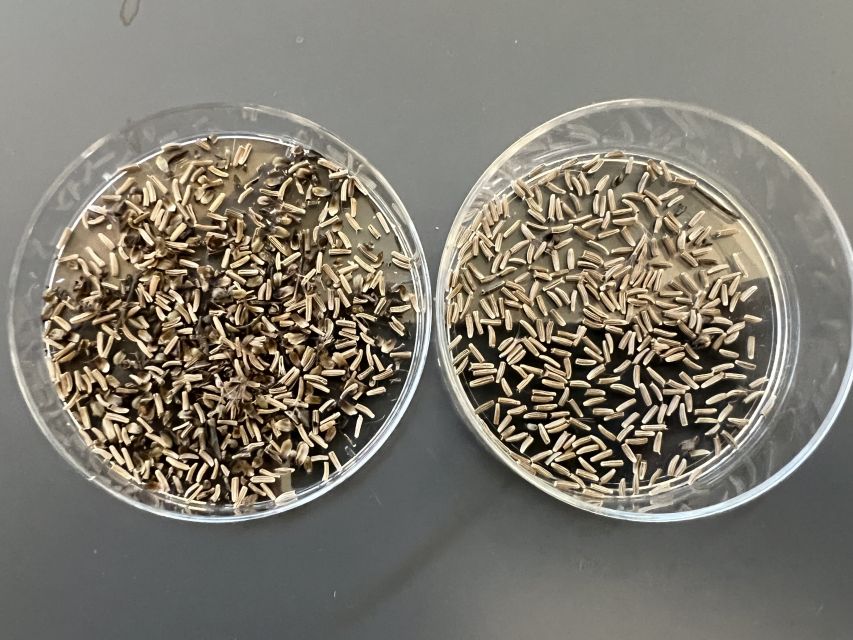
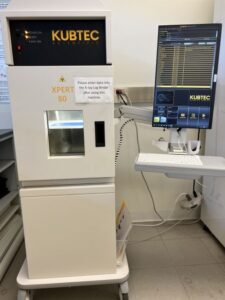
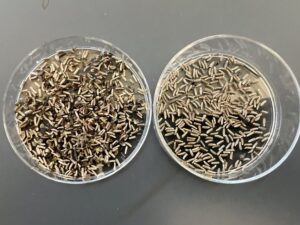
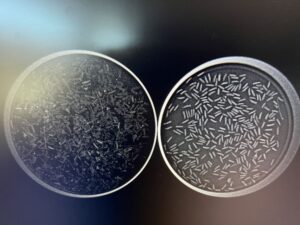
Analysis is the last and most exciting part of the process, unless you find that your seeds are incompetent. The seeds resulting from the cleaning step are placed on a petri plate and viewed x-rayed using the machine shown in the twelfth photo. The mass constituting the embryo and endosperm within competent seeds appears white, whereas incompetent seeds appear dark grey or black. I often x-ray two plates side by side: one with the seeds blown up the column and one with my final set of seeds, as shown in plain sight and through an x-ray in the thirteenth and fourteenth photos, respectively. This allows me to see if I used too strong a current and removed competent seeds. Contrarily, if I see incompetent seeds in my final set, I return to the blower for further processing. The closer the competence is to 100%, the happier our propagator is.
On occasion, x-rays don’t produce as clear a result as I’d like. In these cases, I take a few seeds that are questionable and cut them open. By doing so, you can see a couple indicators of whether the seeds are competent. If you find prominent white embryo/endosperm tissues inside, the seed should be competent. In some taxa, these tissues remain small and other contents suggest whether seeds are competent, such as the presence of oils in some members of the Liliaceae (lily family).
After the percentage competence is noted, seed is passed on to our propagator for stratification or whatever other treatment they may need to germinate. I’ve found that there is something cathartic about going from a mess of dormant plant mass to a small pool of promising seed. And of course, listening to your favorite music or podcast can help plow through seed of the taxa that are most taxing to clean.
Subscribe to eNewsletter