


Ways to Use Moisture Sensors to Automate Greenhouse Irrigation

When using moisture sensors, growers typically determine a set point at which irrigation turns on. Many growers choose this based on experience. However, research indicates that in a typical peat-based growing medium, 5% to 10% is very dry, and 40% is close to container capacity. Most crops start showing signs of drought below moisture levels of 20% to 25%. Hibiscus, however, is very sensitive to the moisture level. That provides a great opportunity for using irrigation for height control.
Automating irrigation can save time and labor in greenhouses. If you are considering automating your irrigation, moisture sensors may be an option to help you make decisions about when to irrigate. Moisture sensors have been around for a while, but in the past 10 to 15 years, the technology has improved quite a bit.
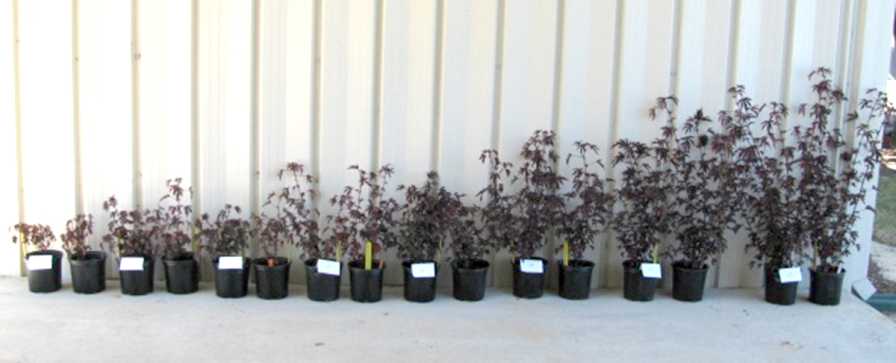
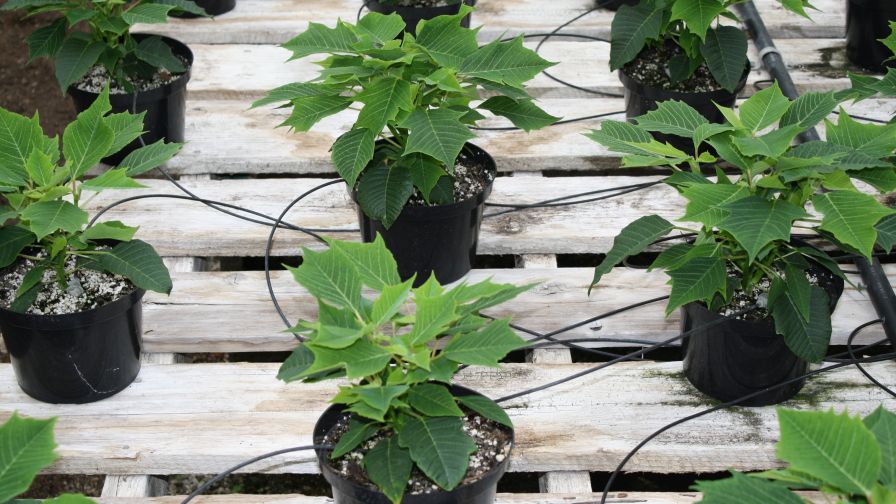
Most moisture sensors measure the volume of water in the substrate relative to the volume of substrate (see photo above). The sensors we have primarily worked with are the ECH2O EC-5 and 10HS sensors from Meter Group, but there are other sensors on the market as well. The main difference between these two sensors is the volume of influence; the 10HS is longer and is more appropriate for larger containers (anything larger than 6-inch pots), while the EC-5 is better for smaller containers (4-inch or 6-inch). We are not aware of any sensors that work well in even smaller containers, like bedding plant trays or seedling flats.
What Can Moisture Sensors Do for Me?
Moisture sensors can continuously monitor how much water is present in the root zone of your plants, allowing your irrigation system to respond to small changes in substrate moisture. Plant water use varies as plants grow and environmental conditions change. Timers, which are frequently used to automate irrigation, don’t respond to changes in light, temperature, or relative humidity and thus cannot accurately provide the amount of water needed by your crops. It is challenging to irrigate plants without over- or under-watering when using a timer; however, this isn’t a problem with moisture sensors, since irrigation can be triggered automatically as the amount of water in the pot drops below a certain threshold.
One of the greatest advantages of using moisture sensors compared to other irrigation techniques is that they provide you with more control over your irrigation. You decide how dry the substrate is allowed to get, based on what is appropriate for your crop and your preferences. You can also specify how long the irrigation system turns on once the measured water content in the substrate reaches that set point. Using this approach has the potential to apply much less water than traditional irrigation techniques. For example, Hibiscus acetosella ‘Panama Red’ (Cranberry Hibiscus) grown in greenhouses in Athens, GA, maintained at a 35% substrate water content used 6.2 gallons of water during a 37-day production period, whereas plants maintained at a 45% substrate water content used 11 gallons (Bayer et al., 2013; Figure 1).
In commercial nurseries, we have seen water-use reductions of more than 80% compared to timer-controlled irrigation. Using less water during production can be advantageous for several reasons. It may reduce the need to add additional wells or reduce electricity costs for water pumps if you are using drastically less water to irrigate your plants. Not over-watering your crops can also reduce or sometimes even eliminate problems with root diseases and shorten the production cycle. Which means more turns.
How Do I Use Sensors to Monitor Irrigation?
Moisture sensors can also be used to monitor irrigation in the greenhouse and/or remotely. Sensors are quite responsive to changes in the moisture in the container, as you can see in Figure 2. We have worked with growers at greenhouses and nurseries who have integrated moisture sensors into their production to automate irrigation. Some growers may choose to maintain their crop at a higher set point (40%, for example) and have no stress for their crop. In Figure 1, you can see that plants grown in drier soil tend to be smaller. So, an alternative approach would be maintaining a lower set point (20%, for example) to reduce plant growth instead of using plant growth regulators to reduce growth. This approach works well with many crops, and our research indicates it can be combined with graphical tracking with poinsettia. Lowering the irrigation threshold when plants were getting too tall can be an effective way to control plant height (Alem et al., 2015).
How Do I Integrate Sensors into My Greenhouse?
Integrating sensors into a greenhouse may be the trickiest step, but fortunately, it is getting easier and will hopefully continue to get easier in the future. One common concern of growers is about the number of sensors needed. There is no simple answer to this, but we have successfully grown crops in a commercial nursery using only a single sensor to trigger irrigation. The size of a single irrigation zone depends on microclimate differences throughout the greenhouses. For example, plants near a cooling pad, where the air is cool and humid, will need less water than those near exhaust fans. One thing you may want to avoid, though, is irrigating multiple species of plants with a single sensor. That may be possible, but it is difficult since plant species will have different growth rates, resulting in very different water usage. If multiple crops need to be combined within a single irrigation zone, it is best to use sensors in the crop that uses the most water to control irrigation.
Sensors, such as the previously mentioned Meter Group sensors, can be connected to systems such as Priva or Argus to automate irrigation relatively seamlessly. There are also a few less expensive options. A relatively new, mid-range cost option is available from Mayim. This is a stand-alone system that works with many different kinds of sensors for automation. The cheapest, but most hands-on, option is to purchase an Arduino microcontroller and relays to connect to sensors and valves for automation (Ferrarezi et al., 2015). With this set-up, the sensors will be the most expensive part of the system. However, you will probably need to feel somewhat comfortable with software programming and working with hardware to set up an automation system using an Arduino.
You can find step-by-step instructions on how to build and program your own irrigation controller at https://hortphys.uga.edu/research/building-irrigation-controllers.html. Do not be tempted by the very cheap soil moisture sensors available online; we have tested several of them, and they do not work.
Where Do I Start?
A good way to start with sensor-controlled irrigation is to install a few sensors and monitor how your irrigation practices affect the water in the pots. Just having access to this quantitative information can help improve irrigation practices. What do changes in water content look like? How dry do you let your crop get? How much leaching occurs (typically visible as very rapid declines in water content right after irrigation)? What happens to water content if you start watering for shorter amounts of time?
Once you are comfortable with the data you get from the sensors, a logical next step is to then automate irrigation, based on the sensor data. One final word of caution: no automated irrigation controller can replace the judgment and experience of a good grower. It is important that a grower actively monitors the crop and makes any necessary adjustments to make sure the crop is properly irrigated.
Resources
Alem, P., P.A. Thomas, and M.W. van Iersel. 2015. Controlled water deficit as an alternative to plant growth retardants for regulation of poinsettia stem elongation. HortScience 50:565-569.
Bayer, A., I. Mahbab, M. Chappell, J. Ruter, and M.W. van Iersel. 2013. Water use and growth of Hibiscus acetosella ‘Panama Red’ grown with a soil moisture sensor-controlled irrigation system. HortScience 48:980-987.
Subscribe to eNewsletter